Best Reloading Kits for 2024: My results after 400 hours of testing
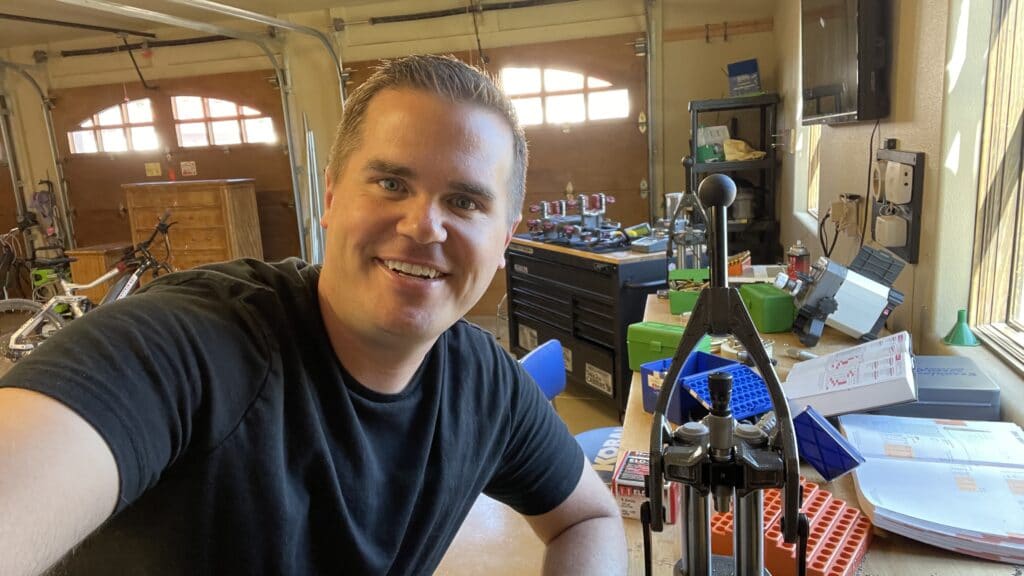
I’ve looked at so many reloading kits. They all promise to be a complete solution for under $500, but I don’t know a single serious reloader who is still using the kit they bought when they started. The box reloading kits come with mostly cheap parts that require so much work to be done by hand that you won’t want to reload ever again.
Mark my words: Buy the kit in the store, and you’ll end up paying much more when you end up upgrading many of the items over time. Reloading can be cheaper than buying factory ammo, but it won’t be if you buy all your reloading gear twice.
I know you’re tempted to skip that last bolded paragraph and just pick up a reloading kit from Hornady, RCBS, etc. Just remember, I warned you.
The following chart is my breakdown of recommended kits depending on your budget. All of these kits can produce better accuracy than factory ammo, but the more you spend, the more convenient it will be to reload. I’ve CAREFULLY selected items in the cheaper bundles that won’t become useless when/if you ever upgrade.
| Reliable Starter Kit | Intermediate Kit | Pro Kit | |
| Approximate Total Cost | $490 | $1,050 | $3,585 |
| Press | RCBS Rock Chucker | Frankford Arsenal M-Press (My most-used press by far. I have two of them.) | Forster Coax (I don’t have one yet, but it’s on my list). |
| Powder Measure | Scale and a Trickler | Hornady AutoCharge Pro. I did EXTENSIVE testing, and this thing beats out the competition for accuracy and speed. | First buy the excellent FX120i scale. Then, buy a Super Trickler to add on top of it (Super Trickler requires the scale to work). Don’t buy the combo from Super Trickler or you’ll have to pay import taxes. |
| Dies | RCBS Two-Die Set | Redding Micrometer Dies | Whidden Dies for full-length resizing, and then a 21st Century Expander Die, and the Black Nitride Mandrels. |
| Cleaning | Don’t even clean your brass. I know. Sounds crazy, but my friend Erik Cortina converted me on this. If it’s good enough for a world champ, it’s good enough for me. | Don’t even clean your brass. I know. Sounds crazy, but my friend Erik Cortina converted me on this. If it’s good enough for a world champ, it’s good enough for me. | Rotary Tumbler and a two-pound bag of steel media. FA Media Separator for separating pins and brass, and dehydrator for drying brass (or use a food dehydrator you already have). |
| Priming Tool | You can use your press to seat primers to start out, but if you can splurge for the intermediate kit’s priming tool, you won’t regret it. | F.A. Platinum Priming Tool | F.A. Platinum Priming Tool |
| Case Trim & Prep | F.A. Case Trim and Prep Center | F.A. Case Trim and Prep Center | F.A. Case Trim and Prep Center |
| Lubricant | Imperial Sizing Wax | Imperial Sizing Wax | Imperial Sizing Wax. If you’re using expander mandrels, add the dry moly lube from 21st Century when you buy the mandrels. |
| Funnel | Lyman Universal | Lyman Universal | Frankford Arsenal Funnel Kit |
| Calipers | Cheap Neiko calipers. They work REALLY well. | 3 pairs of cheap calipers so you can put headspace comparators and bullet comparators on them and leave it. | You have two options: (1) get the premium Mitituyo Calipers that are very well regarded, or (2) Go with the luxury of quantity. I have 5 pairs of cheap calipers on my reloading bench so I can have the comparators permanently attached. So handy. |
| Annealing | Don’t bother. Likely won’t impact accuracy, but your brass won’t last as long. | Don’t bother. Likely won’t impact accuracy, but your brass won’t last as long. | Annealeez. There are WAY more expensive solutions ($2k!), but this thing is faster, more satisfying, and works incredibly well. I just love a good blue collar solution–particularly when it involves open flames near rifle powder. God bless America! |
| Chronograph | None | None, but if there’s ONE item from the pro kit I’d buy, it’d be the Chronograph. Unfortunately, there’s nothing cheap that I’d recommend. | Garmin Xero C1. This is BY FAR the best chronograph on the market. It works very reliably and is in a great form-factor. It’s way better than the Labradar. |
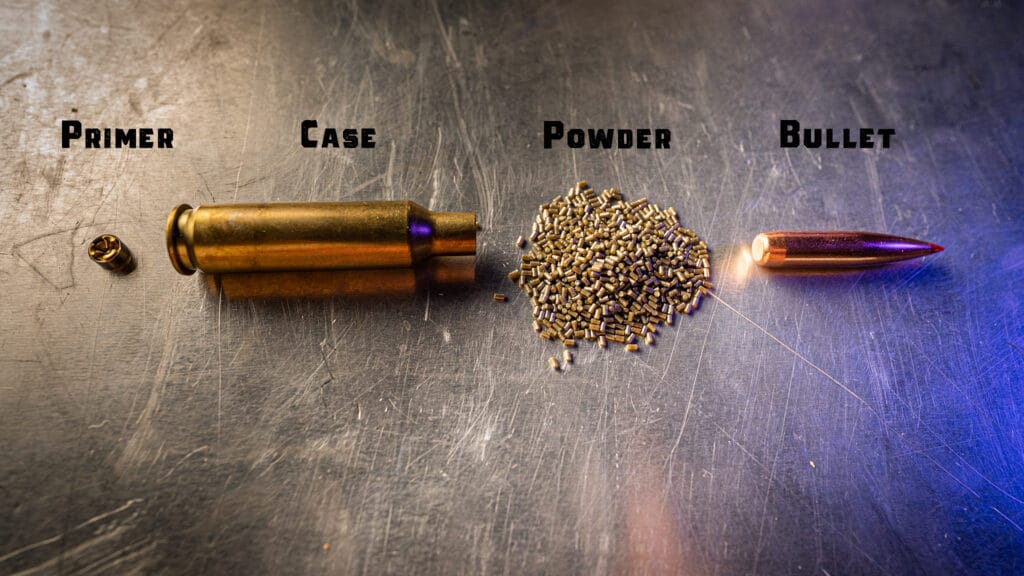
A Few Things to Add to your Kit Over Time
If you buy what’s on the list above, you’ll be totally set to start reloading. If you have a little extra budget, the following items will be very nice to have, but not completely necessary. You could buy these over the next few months as you seek to improve your process.
- Scott Shop Towels (Everything is nasty when reloading. You’ll want to have these handy)
- MTM Reloading Tray (Holds your cases as you work on them. Pretty much a necessity.)
- Hornady OAL Gauge (Will help measure your chamber to make more accurate ammo)
- Hornady Modified Case (Has to be for the specific cartridge you’ll reload. To be used in conjunction with the OAL Gauge)
- Hornady Headspace Gauge kit (Again, more measuring. This will help you measure shoulder bump.)
- Hornady Bullet Comparator Kit
- Ammo box (for taking the finished ammo to the range)
- Bullet Puller If you’re a new reloader, you’re pretty well guaranteed to use one of these a lot 🙂
If You Pick the “Reliable Starter Kit”
Let’s start with the press. Most new reloaders put WAY too much emphasis on what press they choose, and not nearly enough emphasis on powder measures and case trim & prep, which are much more time-consuming steps, and will impact your accuracy far more than your choice in a press.
I picked the Rock Chucker because it’s inexpensive and reliable. It’s possible, however, that you may want to jump up to the Frankford Arsenal M-Press from the intermediate kit if you have a little extra budget. The advantage of the Frankford Arsenal is you don’t have to mess around with shell holders, which is the little metal piece that connects the brass to the press. The Frankford Arsenal doesn’t require shell holders, which is nice if you have rifles of many different chamberings.
For a powder measure, you’ll have a simple scale and hand trickler. With a setup like this, you can actually get very accurate measurements. You’ll probably be more accurate than if you stepped up to the intermediate kit with an electronic powder dispenser, but hand trickling is a slow process. However, it’s a small cost that will get you started, and you won’t be out much if you later decide to get an electronic powder dispenser. Just start simple.
For your dies, I highly recommend choosing the RCBS dies. They are, by far, my favorite of the inexpensive dies. The Hornady and Lee offerings make me crazy. I wouldn’t be tempted to jump up to expensive dies. You’ll get stuck brass, mess up your dies with too much lube or dirty cases, etc. New reloaders are pretty likely to mess up fancy dies, so start with some cheap RCBS dies.
If the reliable starter kit is in your budget, pull the trigger. Seriously, you won’t regret it. An inexpensive kit like this can pay for itself after making just 10 batches of ammo.
If You Pick the “Intermediate Kit”
Most reloaders will eventually have some version of a kit that looks a lot like this. They may start with a “starter” kit, but over time they’ll find they want to save time on certain steps and will move up to something like this.
The “intermediate” kit is probably the kit that will be the cheapest in the long-run because it’ll be easy to make ammo quickly, and you won’t feel the need to replace many of these items–ever.
Also, I honestly apologize for having so much Frankford Arsenal gear recommended here. I am not sponsored by them at all. I truly just went through all my reloading gear and realized that over time, I’ve replaced a ton of gear from the other brands that broke or didn’t do what I want, and I seemed to have ended up with a lot of Frankford Arsenal.
The biggest cost in this kit compared to the starter kit is the addition of the Hornady Autocharge for automatically dispensing and weighing your powder. I did a huge review of electronic powder measures under $500 and that one came out on top. Powder dispensing is the #1 most time-intensive part of reloading for me, so I think an electronic version is a no-brainer. In fact, a lot of reloaders end up getting two of them to move more quickly.
For your press, the Frankford Arsenal M-Press is fantastic. It’s incredibly convenient to use since it requires no shell holders, and has been ultra-reliable for me. I own two of them.
For your dies, I picked Redding micrometer dies. You’ll only need the full-length bushing sizing die and the seater die (I generally don’t recommend shoulder bump dies). Having a micrometer on the seating die makes things easier to replicate and faster to get set properly.
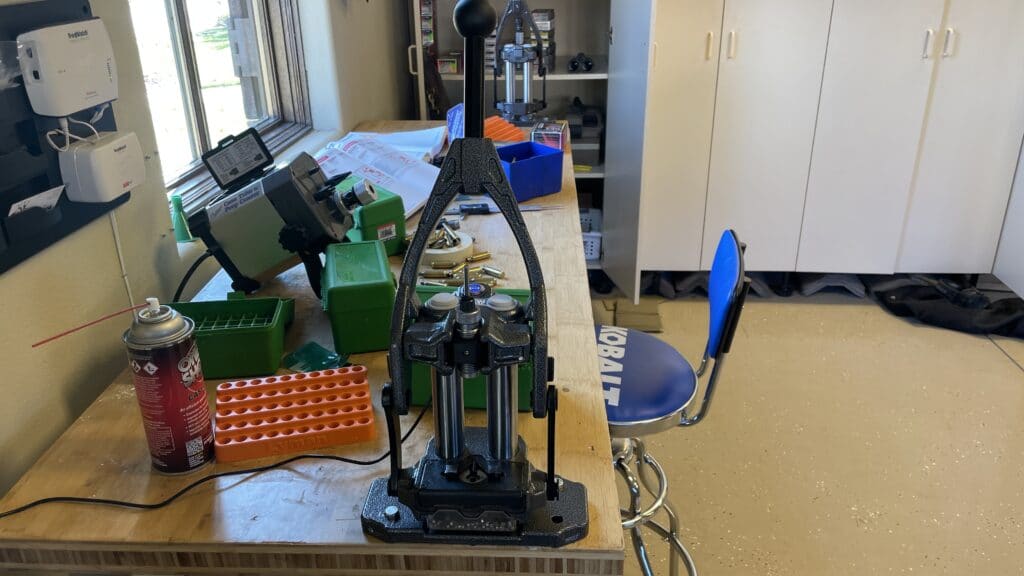
The M-Press
There are a lot of great presses on the market right now, and this is usually the piece that new reloaders obsess over. Then, you start reloading and realize that you SHOULD have obsessed over that chronometer purchase or which set of calipers was best.
In this post, I recommended the Frankford Arsenal M-Press. It’s a cost-effective press with the features of some presses that cost far more. It was released in 2019 with cast-iron construction and a co-axial design which means it has two rods for improved strength and concentricity.
But, to me, the killer feature of the Frankford Arsenal is that you never need to buy another shell holder. Angels sing and liberals come to their senses every time you buy a press that doesn’t require a shell holder. It makes it so you don’t have to search around for that tiny little piece every time you want to switch between calibers that you’re reloading for.
If you want to go big, the coolest press right now is probably the Zero Press from Area 419, which costs just about 6x more than the Frankford Arsenal. Another very popular press is the Forster Coax, which is 3x the price. Both of those are awesome presses, but you’ll have no problem making ammo much more accurate than factory, and save a ton of money by using the Frankford Arsenal M-Press that I recommend here.
Powder Measures/Droppers/Tricklers
You can save a lot of money if you buy a scale and a simple hand trickler in order to measure your powder. It’ll work for making very small batches of ammo, but eventually, I know you’re going to buy one of these automated tricklers.
Fortunately for you, I did a full review of all of the powder dispensers under $500 to find out which one is best. See the video below.
Priming Tool
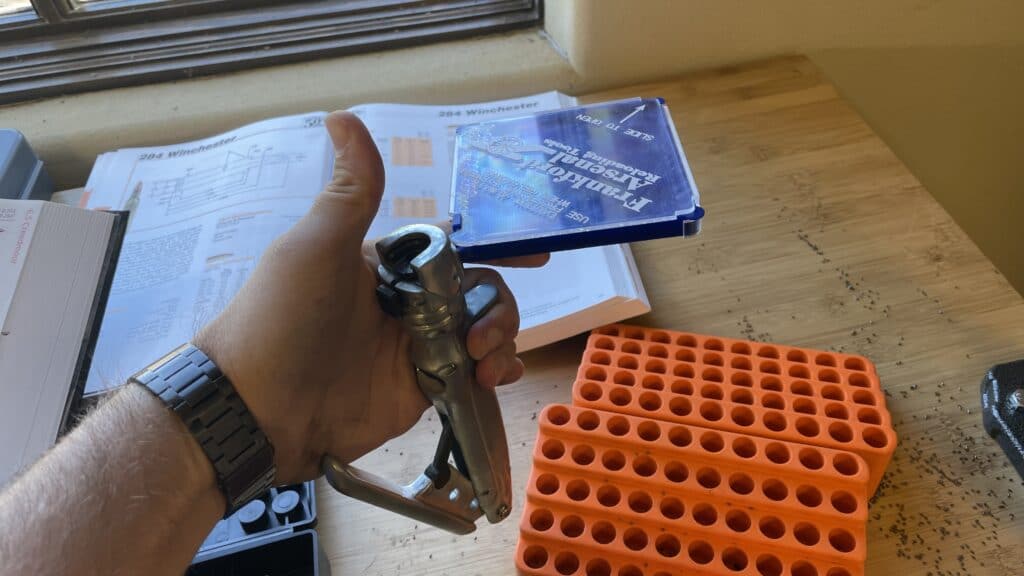
There are a lot of options out there for a hand priming tool. In the end, I really like the Frankford Arsenal. I know, it’s disgusting how much Frankford Arsenal gear I’ve recommended in this post, but it’s because they tend to cater to the not-gucci-but-not-crappy reloading crowd, and that’s exactly where I consider myself. To balance things out, I put a Lyman shell holder underneath it in the picture 🙂
This thing works perfectly. I just don’t have anything to complain about. It’s very solid metal, it’s easy to use, and I’ve had no issues.
Basically, you dump your primers in the top plastic tray. You take the clear lid off and you lightly shake it back and forth until all the primers flip to the right side. It has a genius little pattern of bumps on it that make the primers magically all face the same way.
Then, you put your brass in there, squeeze all the way tight, and boom! You have a primed piece of brass.
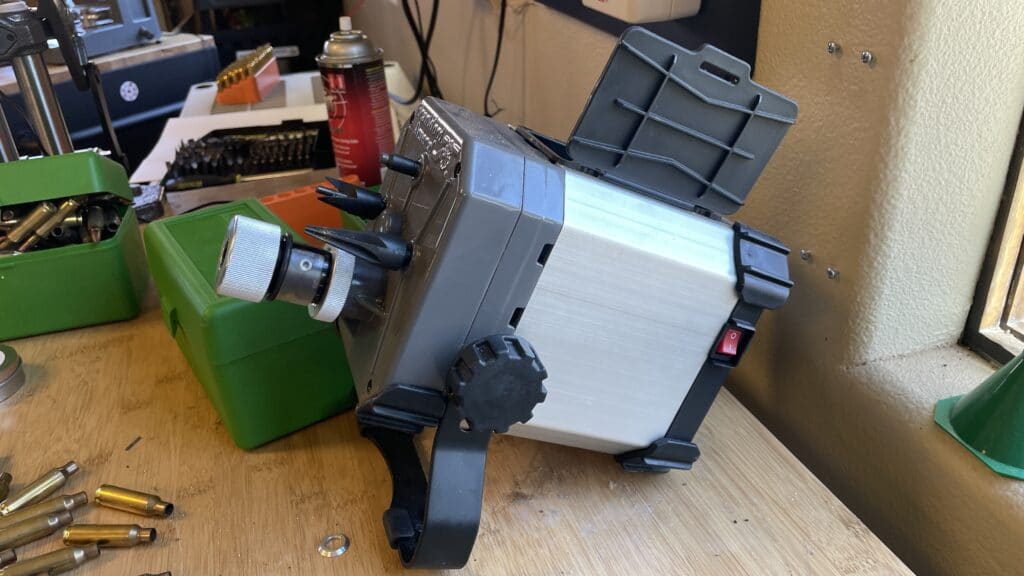
Case Trim and Prep Center
After you fire your cartridge, the brass has to be trimmed, chamfered, and deburred before it can be loaded again.
I’m using the case trim and prep center mentioned in the list at the start of this post, but there are many good options out there. I frankly don’t think anyone has totally solved this problem. Most reloaders hate trimming and prepping brass more than any other part of the process, and I agree.
Basically, what this does is you take your cleaned brass and measure it. If it’s too long, you stick the neck of the case into this machine to trim it slightly. If brass is left too long, it can create a dangerous condition by crimping the neck of the case onto the bullet and increase the pressure in the chamber.
Your reloading manual will say how long you should trim the brass to, and what the max trim length is. Stick to those numbers every time. You won’t always need to trim the brass. Often you’ll measure it and still be within spec, but every 2-3 firings, you’ll need to trim.
Although you don’t need to trim every time, you will need to chamfer and debur. Basically that just means slightly cutting the edges of the neck so it doesn’t have any burs or edges that could alter the neck tension. You just hold the neck of the brass against the spinning bits and it’ll cut it slightly. Takes about 6 seconds total per piece of brass to chamfer and debur. I usually hold each piece of brass on each tool for about 2 seconds.
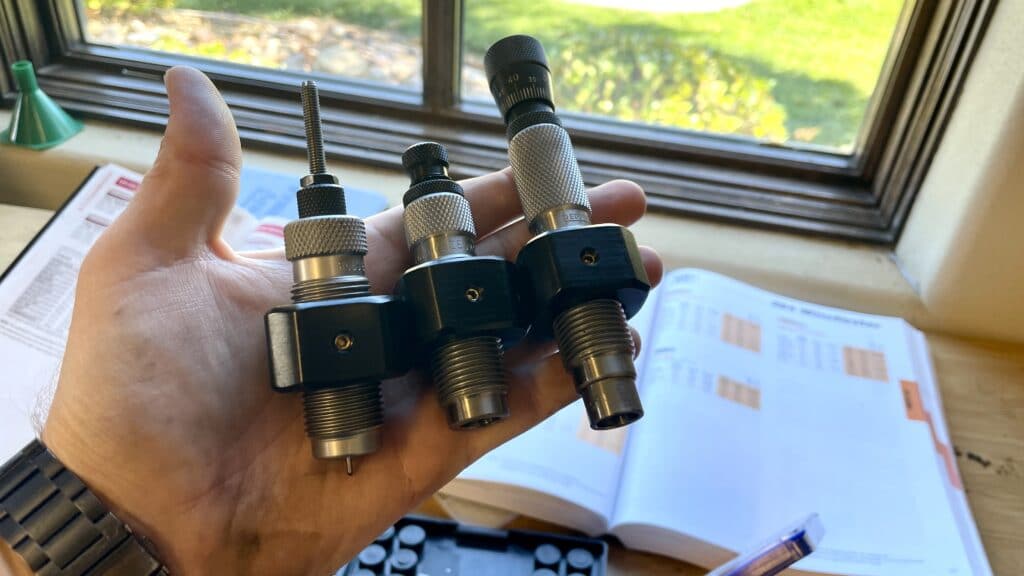
Let’s Talk About Dies
I think it’s probably best in this case that you buy an inexpensive set of RCBS dies first. You’ll scratch them when you haven’t properly cleaned the case. You’ll gum them up when you use too much imperial sizing wax. You’ll drop them. You’ll get a case stuck when you don’t believe me that you need to lube them and go to try it without any lube (I may have learned this the hard way, LOL). You’ll figure out what cartridges you really want to get serious about reloading.
I can assure you that the cheap RCBS dies will be perfectly capable of producing ammo better and more accurate than factory ammo if you learn to use them right. Then, once you have your system in place and you’ve figured out your kit, stepping up to some Redding micrometer dies will be a nice luxury, and they’ll last you for a long, long time.
You just need two dies. First, a full-length resizing die with decapping pin. That will resize the case after being shot, and punch the old primer out for you. The second die you’ll need is a bullet seating die. It just smashes the new bullet into the case as the last step of reloading. You may also hear about neck sizing dies. They leave most of the cartridge dimensions alone, and only resize the neck.
Reloaders will debate for eternity whether you should full-length resize or just neck size. For me, I look to benchrest and f-class world champions who full-length size every time. Plus, it’s easier and will produce more reliable reloads. There are loads of people who also have extremely good success neck sizing. That’s great too. To each, his own. But for a new reloader, I’d just full-length resize. So you really only need a two-die set. If you get a three die set, cool. That works too and you can try neck sizing if you prefer it.
